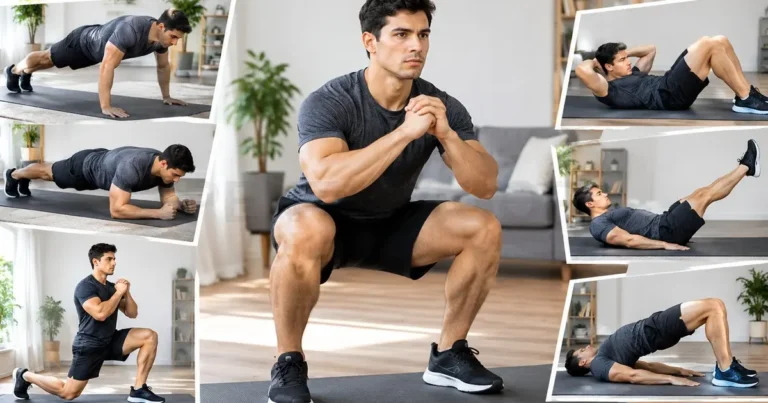
Are you wondering whether the split squat deserves a place in your leg workouts, or why it feels so much harder than a regular squat? This guide explains which muscles it trains, how to perform it with good technique, which variations to try, and how to fit single-leg work into your week. We reviewed current research and major health guidelines so that every recommendation stays practical and evidence-based.
What Is a Split Squat?
A split squat is a single-leg-dominant strength exercise performed from a staggered stance, in which both feet stay in place while you lower your back knee toward the floor and then stand back up. Your front leg does most of the work, and your back leg mainly adds balance and support. Because your feet do not move, the pattern is easy to repeat and simple to load with dumbbells, a barbell or a kettlebell. Beginners, athletes and people returning to training all use it to build leg strength with a manageable balance demand.
Split Squat vs Lunge: Key Differences
The key difference is foot movement: in a split squat your feet stay fixed, while in a lunge one foot steps away and returns on every repetition. Biomechanics researchers note that the fixed-foot version moves mainly up and down, which lets you build lower-body strength in a relatively stable position. A lunge asks your thigh, glute and calf muscles to work harder to keep you balanced as you step (Song et al., 2023).
For most people, the fixed-foot version is easier to learn and to load safely, so it suits beginners and anyone with balance or coordination challenges. A lunge trains stepping, braking and re-accelerating, which is useful for sports with changes of direction. Many programs include both, usually starting with the fixed-foot version.
- Fixed-foot version: lower balance demand, easier to load, and well suited to learning the single-leg pattern.
- Lunge: higher balance demand, more stepping control, and closer to running and cutting movements.
- Both: effective for building leg strength when you perform them with control.
Why Single-Leg Training Matters for Strength and Balance
Single-leg training, also called unilateral training, matters because each leg must lift and control your body weight on its own. A stronger side cannot quietly cover for a weaker one, which may help you notice and gradually reduce differences between your legs. This also mirrors daily life, since walking, climbing stairs and running all involve repeated moments of standing on one leg.
Balance and strength matter at every age. The WHO recommends that adults aged 65 and older do varied multicomponent physical activity, which combines functional balance and strength training, on 3 or more days per week to improve functional capacity and help prevent falls. Single-leg exercises fit naturally into this kind of routine, provided you start gently and use support when needed.
Single-leg work is also an effective way to get strong. In a five-week trial of academy rugby players who trained twice weekly, a unilateral squat group and a bilateral squat group both improved, with no significant differences between them (Speirs et al., 2016). Single-leg exercises also tend to use lighter absolute loads. Now let us look at which muscles do the work.
Split Squat Muscles Worked
The split squat works mainly the quadriceps and glutes, while the hamstrings, adductors, calves and trunk muscles assist and stabilize. Researchers measure muscle effort with electromyography (EMG), a method that records the electrical activity of muscles. Results show that the balance of effort shifts with your stance, torso position and variation. Several biomechanics studies describe the movement as hip-dominant, meaning your hips contribute more than your knees.
Quadriceps and Glutes as Prime Movers
The quadriceps, the large muscles on the front of your thigh, and the gluteus maximus, your largest buttock muscle, are the prime movers. The quadriceps straighten your knee, and the glutes extend your hip, so both work together to push you up from the bottom position.
In one EMG study, 11 moderately strength-trained participants performed the split squat, the rear-foot-elevated version and a single-leg squat at the same relative load, close to failure. Peak activity in the gluteus maximus and the vastus lateralis, a quadriceps muscle, did not differ significantly between the exercises (Mausehund et al., 2018). This suggests you can expect a similar stimulus to these muscles from all three.
If your main goal is glute development, other exercises may add to the picture. A 2021 study found higher peak glute activity in the barbell hip thrust than in the back squat or the split squat (Williams et al., 2021). Pairing single-leg work with a hip-focused lift is a sensible, common approach.
Adductors, Hamstrings and Stabilizers
The adductors (inner thigh muscles), hamstrings, calves and gluteus medius act as supporting muscles that keep your hips level and your knee steady. The gluteus medius, on the side of your hip, helps stop your pelvis from dropping and your knee from drifting inward. In the Mausehund study, its activity reached about 46% of maximum in the split squat, 55% in the rear-foot-elevated version and 82% in the single-leg squat.
Your hamstrings and calves contribute more as your stance gets longer. Song et al. (2023) found that longer steps increased activity in the hamstrings and calf muscles, and the rear-foot-elevated version has been linked to higher hamstring co-activation. The adductor magnus, a large inner-thigh muscle, also helps extend your hip. With the muscles mapped out, we can turn to technique.
How to Do a Proper Split Squat
A proper split squat starts with a stable staggered stance, a tall posture and a slow, controlled descent that you can reverse without losing balance. Warm up first with 5 to 10 minutes of brisk walking or easy cycling, plus a few leg swings. Then follow the steps below, and read the next three sections for details on stance, torso and knee position. Set up on a flat, non-slip surface with a pad or folded towel for your back knee.
- Stand tall, step one foot forward and the other back, and keep your feet about hip-width apart from side to side.
- Keep your front foot flat and rise onto the ball of your back foot.
- Place your hands on your hips or hold light weights, with your ribs stacked over your pelvis.
- Lower straight down by bending both knees until your back knee hovers just above the floor.
- Pause briefly, then press through your whole front foot to stand up.
- Finish all repetitions on one side, then switch legs.
Stance Length and Foot Position
A good starting stance is about as long as your leg, with your front foot flat and your feet about hip-width apart. In a laboratory study of 20 young men, step lengths of 50%, 70%, 100% and 120% of leg length were compared. Longer steps shifted effort toward the hip extensor muscles, and the authors suggested a step close to leg length for healthy adults (Song et al., 2023).
Individual needs vary. Very short steps are not advocated for knee rehabilitation because they increase knee loading, and a longer step may suit you if your ankle mobility is limited. If your front heel lifts or your knee crowds forward, adjust by a few inches and test again.
- Front foot flat, with weight spread across your heel, big toe and little toe.
- Feet about hip-width apart, not on a tightrope line.
- Back heel lifted, toes pointing forward.
- Front knee tracking in line with your second toe.
Torso Angle: Quad vs Glute Emphasis
An upright torso places more demand on your quadriceps, while a slight forward lean from the hips shifts more demand to your glutes and hamstrings. In a study of the forward lunge, leaning the trunk forward increased hip extensor muscle activity, although the authors described the increases as relatively small (Farrokhi et al., 2008). A 2025 study of the rear-foot-elevated version similarly found that trunk flexion raised activity in the gluteus maximus, biceps femoris and rectus femoris.
Whichever position you choose, hinge at the hips and keep your spine long rather than rounding your back. Small changes are enough, so try one set upright and one set with a modest lean, and notice where you feel the work. If you have back pain or a history of spinal problems, ask your clinician which position suits you.
- Quad emphasis: tall chest, ribs over pelvis, and your front knee free to glide forward.
- Glute emphasis: a modest forward lean from the hips, a flat back, and weight over the middle of your front foot.
Knee Travel and Depth
Your front knee may travel past your toes as you lower, provided your heel stays down and your knee tracks in line with your foot. In one older study of the barbell back squat, forcing the knees to stay behind the toes reduced knee torque by 22% but increased hip torque by 1,070% (Fry et al., 2003). For depth, lower only as far as you can control without pain, ideally until your back knee hovers just above the floor.
Common Split Squat Mistakes and Fixes
The most common mistakes are a stance that is too short, a knee that collapses inward, a rounded back and rushed repetitions. Each one is usually easy to correct with a small adjustment, and fixing them tends to make the exercise feel smoother and more comfortable. Use a mirror, or record a short video from the side and the front, to check your form.
- Mistake: front heel lifts. Fix: lengthen your step slightly and keep your whole foot down.
- Mistake: front knee collapses inward. Fix: guide your knee toward your second toe and reduce the load.
- Mistake: rounded or arched back. Fix: brace your trunk, lower the weight and shorten your range.
- Mistake: pushing hard off the back foot. Fix: keep most of your weight on the front leg.
- Mistake: wobbling on a tightrope line. Fix: widen your feet slightly from side to side.
- Mistake: rushing repetitions. Fix: lower for about two seconds and rise smoothly.
Fixing small details early builds a solid foundation for everything that follows. Once you can complete every repetition with control on both legs and without pain, you are ready to progress to a more demanding option. Next, we will look at the main variations, arranged from easiest to hardest.
Split Squat Variations From Easiest to Hardest
The safest way to progress is to change one variable at a time: support, range of motion, elevation or load. We list the main options below in a typical order, although the hardest version for you depends on your balance, mobility and strength. Moving up only when you can complete every repetition smoothly keeps the challenge steady and the risk of overreaching low.
Static and Supported Split Squats
A static version keeps both feet fixed, and a supported version adds a hand on a wall, rail or suspension strap for balance. Researchers note that the static foot position lets you handle load better and more safely than a stepping lunge, which makes it a preferred option for beginners or people with balance or coordination challenges (Song et al., 2023).
Begin with a short range of motion if you need to, lowering to a cushion or low pad placed under your back knee. Use only fingertip support so that your legs, rather than your arms, do the work. When you can complete two sets of eight controlled repetitions per leg, add range of motion before you add weight.
- Keep your weight mostly on your front leg.
- Lower for about two seconds and rise smoothly.
- End the set when your form changes, not when you are exhausted.
Rear-Foot-Elevated (Bulgarian) Split Squat
The rear-foot-elevated version, often called the Bulgarian split squat, places your back foot on a bench so that your front leg works harder and your balance is challenged more. In the Mausehund study, it produced similar glute and quadriceps activity to the standard version but higher hamstring co-activation. Many people find the back hip stretch and the balance demand tricky at first.
A biomechanics study compared this version, loaded at about 35% of back squat one-repetition maximum, with a back squat at 70%. Both were hip-dominant, and knee displacement was smaller in the single-leg version (Int J Exerc Sci, 2021). Lighter absolute loads can therefore feel challenging, so progress patiently.
- Place your back foot on a bench at about knee height, with your toes tucked or laces down.
- Step your front foot out farther than in the standard version so that your front shin stays close to vertical at the bottom.
- Begin with bodyweight before adding any load.
Front-Foot-Elevated and Deficit Split Squats
Front-foot-elevated and deficit variations place your front foot on a low platform, such as a weight plate or a small step, so that you lower through a longer range of motion. The extra depth increases the demand on your quadriceps and glutes at the bottom and asks more of your hip and ankle mobility. Direct research comparing these versions appears limited, so treat our guidance as practical coaching advice rather than proven rules.
Start with a platform of about 2.5 to 5 centimeters (1 to 2 inches) and use bodyweight only. Move up gradually, and stop if you feel pinching at the front of your hip or pain at your knee. This option suits people who already control the standard version well, and it may not be appropriate during knee rehabilitation.
Loaded Variations: Dumbbell, Barbell and Landmine
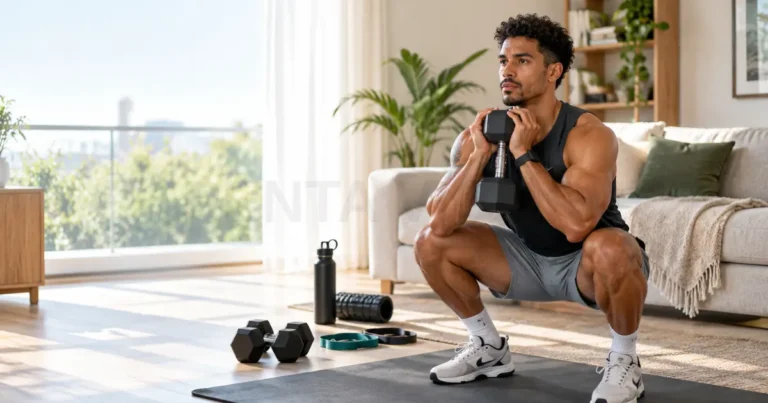
Loaded variations add external weight with dumbbells, a barbell or a landmine so that you can keep progressing once bodyweight becomes easy. Dumbbells held at your sides are the simplest option, and a kettlebell held at your chest adds a front-loaded challenge for your trunk. For many beginners, a starting load of 5 to 10 kilograms (about 10 to 20 pounds) in each hand is plenty.
A barbell on your back allows heavier loads but needs a rack, safety pins and more setup. A landmine attachment anchors one end of the barbell so that you hold the other end near your shoulder, which many lifters find stable. The 2026 ACSM position stand notes that bodyweight, band and home-based training can all be effective, so heavy loads are optional. Use the checklist below to keep loaded sets safe.
- Set up in a rack with safety pins if you use a barbell.
- Choose a stable bench and non-slip shoes.
- Increase the weight in small steps, only after all repetitions feel controlled.
- Stop a set if your balance, back position or knee alignment breaks down.
Other Single-Leg Exercises to Pair With Split Squats
Pairing this exercise with other single-leg exercises covers movements it trains less, including the hip hinge, side-to-side control and stepping. Common choices include step-ups, lateral lunges, the single-leg Romanian deadlift (RDL), the skater squat and, for advanced exercisers, the pistol squat. Choose one or two that match your goals, rather than adding all of them at once. We will start with the simplest options.
Step-Ups and Lateral Lunges
A step-up is performed by placing one foot on a box or bench and standing up through that leg, while a lateral lunge steps wide to one side and sits back into one hip. Both work the quadriceps and glutes, and the lateral lunge adds extra demand on your inner thigh muscles as you move in the side-to-side plane.
Both exercises transfer well to stairs, hills and sports that involve changing direction, and both are easy to scale, so begin with bodyweight and a low box or a small side step. Increase the range, the height or the load only when you can complete every repetition smoothly and without pain. Use the cues below to keep each repetition controlled and safe.
- Step-up: place your whole foot on a box at or below knee height, drive through the heel and avoid pushing off the back foot.
- Lateral lunge: keep your trailing leg straight and your toes pointing forward, sit your hips back, then push back to the start.
Single-Leg Romanian Deadlift and Skater Squat
The single-leg Romanian deadlift is a hip-hinge exercise in which you balance on one leg, lean forward from the hips and return upright, which trains your hamstrings, glutes and balance. It complements squat-style work because your hamstrings take on a larger share of the effort. Use a light weight, a soft knee and level hips, and move slowly.
The skater squat is a single-leg squat in which you stand on one leg and lower your opposite knee toward the floor behind you. The pistol squat is a deeper single-leg squat with the other leg extended in front. Both demand strength, balance and ankle mobility, and a single-leg squat produced higher gluteus medius activity than the split squat in one study (Mausehund et al., 2018). Treat both as advanced options, then plan your week.
Programming Single-Leg Training
Good programming means choosing a frequency, volume and load that you can repeat consistently and then increasing the challenge gradually. The World Health Organization (WHO) recommends that adults do muscle-strengthening activities involving all major muscle groups on at least 2 days per week. In the European Union, 45% of people say they never exercise or play sport, and lack of time is the main barrier, so a simple, time-efficient plan matters (European Commission, 2022).
Placement in the Weekly Plan
For most people, single-leg work fits best on two non-consecutive days each week, placed early in a session after your warm-up. For example, you could train single-leg squats on Monday and Thursday, either after a main lift or as the main lower-body exercise. Leave at least one day between harder leg sessions, and add accessory exercises such as step-ups or single-leg RDLs once your technique is steady.
- Monday: warm-up, a single-leg squat variation for 2 to 3 sets per leg, step-ups, and upper-body work.
- Tuesday and Wednesday: rest, easy walking, cycling or mobility work.
- Thursday: a single-leg squat variation for 2 to 3 sets per leg, single-leg RDLs, and core work.
- Weekend: an activity you enjoy, such as hiking, swimming or a relaxed bike ride.
Sets, Reps and Load for Strength vs Hypertrophy
For strength, the 2026 American College of Sports Medicine (ACSM) position stand points to heavier loads of around 80% of your one-repetition maximum (1RM) for 2 to 3 sets per exercise, and for muscle growth it points to about 10 sets per muscle group each week. It also notes that training to failure is not required to make meaningful gains.
- Beginners: 2 sets of 8 to 12 controlled repetitions per leg with bodyweight, on two days per week.
- Strength focus: 2 to 3 sets per leg with a challenging load that you can lift for roughly 6 to 10 repetitions.
- Muscle growth focus: spread about 10 weekly sets for your quadriceps and glutes across several exercises, stopping a couple of repetitions short of failure.
- For every goal: start with your weaker leg and match the repetitions on both sides.
These ranges apply to healthy adults, and they are starting points rather than prescriptions. If you are managing an injury, pain or a medical condition, your plan may look different, and your clinician can help you adjust the numbers. The next section covers rehabilitation and sport.
Single-Leg Training for Knee Rehab and Athletes
Single-leg training is widely used in knee rehabilitation and in sport, but when and how you begin should be guided by your clinician. Many sports involve running, cutting and jumping from one leg, so single-leg strength is relevant for athletes. In rehabilitation, this exercise is often introduced in the later stages, for example after cruciate ligament reconstruction (Song et al., 2023). This article is not a rehabilitation program.
For athletes, the appeal is practical. In the rugby trial cited earlier, both the unilateral and bilateral groups improved on strength, sprint and agility tests, so single-leg squats can be a reasonable choice when you want to vary your training or reduce spinal loading (Speirs et al., 2016). Athletes should still coordinate load and volume with their coach or sports medicine team.
Using Split Squats After Knee Injury Under Physio Guidance
You should use this exercise after a knee injury only when your physical therapist (physiotherapist) or surgeon confirms that your knee is ready. After anterior cruciate ligament (ACL) reconstruction, a prospective study of 106 people who played pivoting sports found that the reinjury rate fell by 51% for each month that return to sport was delayed, up to 9 months. More symmetrical quadriceps strength before returning also lowered reinjury risk (Grindem et al., 2016).
For kneecap-related pain, called patellofemoral pain, an international consensus statement supports exercise therapy, especially a combination of hip-focused and knee-focused exercises, in preference to knee exercises alone (International Patellofemoral Pain Research Retreat, 2018). Researchers also caution that very short stances increase knee loading, so your clinician may adjust your step length, depth and load.
No exercise is worth pushing through certain symptoms. Stop and contact your doctor or physical therapist promptly if you notice any of the following warning signs, and seek urgent care if you cannot bear weight on your leg after an injury.
- Sudden swelling, or a feeling that your knee is giving way.
- A locking or catching sensation that stops your knee from moving smoothly.
- Sharp or worsening pain during or after exercise.
- Redness, heat or fever in or around the joint.
- Numbness, tingling, or a cold, pale foot.
Your clinician can tailor exercise selection, step length and load to your stage of recovery, which is far more reliable than general guidance. With that in mind, the final section answers the questions we hear most often about this exercise and its variations.
Split Squat FAQs
These are the questions people most often ask about this exercise. The short answers below draw on the research and guidelines cited in this article. They are general guidance for healthy adults, so please adjust them to your own health, training history and any advice from your clinician.
Are Split Squats Better Than Back Squats?
Neither is universally better, because they train similar muscles and suit different goals. In the rugby players trial mentioned earlier, both unilateral and bilateral squat groups improved, with no significant differences between them (Speirs et al., 2016). Back squats usually allow heavier absolute loads, while single-leg versions need lighter loads and may feel gentler on your lower back. Many lifters use both across the week.
How Deep Should a Split Squat Go?
Go as deep as you can control with your front heel down, your torso steady and no pain, which for most people means your back knee hovers just above the floor. Research protocols often lower until the front thigh is parallel to the floor, which is a reasonable minimum target if your mobility allows (Song et al., 2023). If depth causes pinching or pain, reduce your range and consult a clinician.
Why Do Split Squats Hurt My Knees?
Knee discomfort can reflect a stance that is too short, a knee that drifts inward, too much load too soon, or an existing kneecap problem. Try lengthening your step, slowing your descent, reducing the weight and keeping your knee in line with your second toe. Pain that is sharp, persistent or accompanied by swelling needs professional assessment, because exercise therapy for kneecap pain works best when it is individualized.
How Many Split Squat Reps per Leg?
For most healthy adults, 6 to 12 controlled repetitions per leg for 2 to 3 sets is a sensible starting range. Heavier sets of about 6 to 10 repetitions suit strength goals, while moderate loads and slightly higher repetitions can build muscle when weekly volume is adequate (ACSM, 2026). Match the repetitions on both legs, begin with your weaker side and stop each set while your form is still clean. Let us bring everything together.
In summary, the split squat is a practical, scalable single-leg exercise that trains the quadriceps and glutes while challenging your balance. We covered the muscles it works, step-by-step technique, variations from easiest to hardest, complementary single-leg exercises, programming ranges and the role of clinical guidance after knee injury. Start with a comfortable stance and controlled repetitions. If you have questions or experiences to share, please leave a comment below, and speak with a qualified professional about any persistent pain.